Chocolate Hazelnut Thumbprint Cookies
Highlighted under: Sweet Favorites
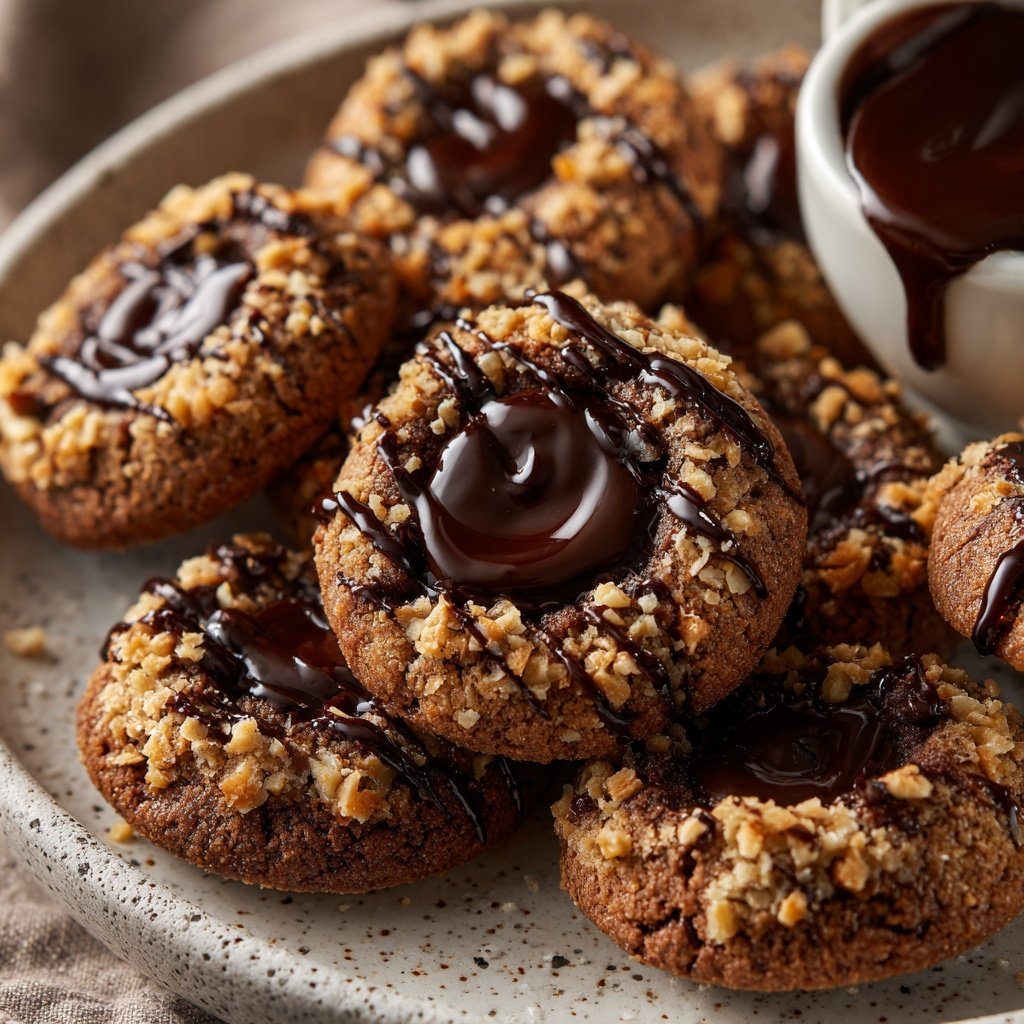
When I first made Chocolate Hazelnut Thumbprint Cookies, I knew I had discovered something truly special. The rich, nutty flavor of hazelnuts combined with the sweetness of chocolate creates a delightful treat. I love how easy these cookies are to make, yet they always impress my family and friends. Whether for a festive gathering or a casual dessert at home, these cookies bring joy with every bite. The thumbprint feature allows for endless variations, showcasing creativity and flavor. Let's dive in and make some delicious memories together!
Throughout my baking journey, I've always been drawn to the combination of chocolate and hazelnuts. The moment I crafted these Chocolate Hazelnut Thumbprint Cookies, it felt like magic in my kitchen. Each cookie offers a satisfying crunch on the outside while remaining soft and gooey in the center. The key is to chill the dough slightly before baking, which helps the cookies keep their shape and ensures a perfectly melted chocolate filling.
As I shared these cookies with friends, the reactions were priceless. Everyone commented on the delicate balance of flavors and the charming thumbprint design. I even experimented with different fillings and found that hazelnut spread works wonderfully too! The versatility truly makes these cookies a new favorite in my recipe collection.
You Will Love These Cookies Because
- The delightful crunch of hazelnuts paired with rich chocolate.
- Perfectly soft center that melts in your mouth.
- A charming shape that makes them ideal for gifting or sharing.
Why Choose Hazelnuts?
Hazelnuts are an essential ingredient in these Chocolate Hazelnut Thumbprint Cookies, providing a unique crunch and flavor profile that complements the richness of chocolate beautifully. When finely chopped, they not only add texture but also a distinctive nutty aroma that infuses the dough as it bakes. If you're in a pinch or have nut allergies, you can substitute them with finely chopped almonds or pecans, but keep in mind the flavor will vary slightly.
Another fantastic aspect of hazelnuts is their health benefits. Packed with antioxidants, vitamins, and healthy fats, they make these cookies a slightly more nutritious option for indulgence. Just a handful can elevate the nutritional value and contribute to positive heart health. Selecting high-quality hazelnuts ensures that depth of flavor shines through, so consider sourcing them from local stores or specialty shops.
Texture and Baking Tips
Achieving the perfect texture is crucial in these cookies. The combination of powdered and granulated sugars along with softened butter creates a delicate balance that results in a soft center. Make sure to cream the butter and sugars until light and fluffy—this generally takes around 3-5 minutes. It helps to incorporate air, yielding a tender, melt-in-your-mouth cookie.
During baking, keep an eye on your cookies; they should have slightly less than golden edges. If you overbake them, you'll end up with a dry cookie rather than the desired soft, chewy center. A good rule of thumb is to remove them from the oven as soon as they look set but still soft in the middle—this usually occurs after about 10-12 minutes at 350°F (175°C).
Ingredients
Gather all your ingredients before starting to make the process smoother and more enjoyable.
For the Cookies
- 1 cup all-purpose flour
- 1/2 cup unsweetened cocoa powder
- 1/2 cup granulated sugar
- 1/2 cup unsalted butter, softened
- 1/4 cup powdered sugar
- 1/4 teaspoon salt
- 1/2 teaspoon vanilla extract
- 1/2 cup finely chopped hazelnuts
For the Filling
- 1/2 cup chocolate hazelnut spread
Make sure all ingredients are at room temperature to ensure even mixing and optimal flavor.

Instructions
Begin by preheating your oven and preparing your baking sheet.
Preheat the Oven
Preheat your oven to 350°F (175°C) and line a baking sheet with parchment paper.
Mix the Ingredients
In a large bowl, cream together the softened butter and granulated sugar until light and fluffy. Stir in the powdered sugar, vanilla extract, and chopped hazelnuts. Gradually add in the flour, cocoa powder, and salt, mixing until combined.
Shape the Cookies
Scoop tablespoon-sized amounts of dough and roll them into balls. Place them on the prepared baking sheet, spaced about 2 inches apart. Gently press your thumb into the center of each cookie to create a thumbprint.
Bake the Cookies
Bake in the preheated oven for 10-12 minutes. Remove from the oven and allow to cool for a few minutes.
Add the Filling
While the cookies are still warm, fill each thumbprint with a small amount of chocolate hazelnut spread. Allow to cool completely before serving.
Once cooled, enjoy your delicious cookies with a cup of tea or coffee!
Pro Tips
- For an extra touch, sprinkle some sea salt on top of the hazelnut spread before it sets for a delightful contrast.
Making Ahead and Storage
These Chocolate Hazelnut Thumbprint Cookies can be made ahead of time, making them a convenient choice for busy schedules. Once formed into balls, you can freeze the dough. Place the cookie balls on a baking sheet, freeze until solid, then transfer them to an airtight container or freezer bag. They can stay fresh in the freezer for up to three months. When you're ready to bake, simply add a couple of extra minutes to the baking time—there's no need to thaw!
If you have leftover cookies, store them in an airtight container at room temperature for up to a week. For the best flavor and texture, though, consider refrigerating if you're keeping them longer than a few days, as the chocolate hazelnut spread filling prefers the cooler environment to prevent it from becoming overly gooey. Just make sure to bring them back to room temperature before serving for that perfect texture.
Variations to Explore
Feel free to experiment with the filling of these thumbprint cookies! While chocolate hazelnut spread is a classic choice, you could easily try using fruit preserves or even a flavored cream cheese spread for a delightful twist. Raspberry or apricot preserves could add a lovely tartness that balances well with the rich cookie base, enhancing the overall flavor experience.
For an extra touch of flair, consider adding spices to the dough, such as cinnamon or espresso powder. These can deepen the flavor profile and make the cookies even more enticing. If you're feeling adventurous, a sprinkle of sea salt on top of the filling before they cool can enhance the sweetness and add an exciting contrast. The possibilities are limitless!
Questions About Recipes
→ Can I use almond flour instead of all-purpose flour?
Yes, you can substitute almond flour, but it may slightly change the texture and taste.
→ How can I store these cookies?
Store them in an airtight container at room temperature for up to one week.
→ Can I freeze these cookies?
Absolutely! You can freeze the dough or the baked cookies for up to three months.
→ What can I substitute for hazelnuts?
Feel free to use walnuts or pecans as a substitute if hazelnuts are unavailable.
Chocolate Hazelnut Thumbprint Cookies
Created by: Ffion Llewellyn
Recipe Type: Sweet Favorites
Skill Level: Intermediate
Final Quantity: 24 cookies
What You'll Need
For the Cookies
- 1 cup all-purpose flour
- 1/2 cup unsweetened cocoa powder
- 1/2 cup granulated sugar
- 1/2 cup unsalted butter, softened
- 1/4 cup powdered sugar
- 1/4 teaspoon salt
- 1/2 teaspoon vanilla extract
- 1/2 cup finely chopped hazelnuts
For the Filling
- 1/2 cup chocolate hazelnut spread
How-To Steps
Preheat your oven to 350°F (175°C) and line a baking sheet with parchment paper.
In a large bowl, cream together the softened butter and granulated sugar until light and fluffy. Stir in the powdered sugar, vanilla extract, and chopped hazelnuts. Gradually add in the flour, cocoa powder, and salt, mixing until combined.
Scoop tablespoon-sized amounts of dough and roll them into balls. Place them on the prepared baking sheet, spaced about 2 inches apart. Gently press your thumb into the center of each cookie to create a thumbprint.
Bake in the preheated oven for 10-12 minutes. Remove from the oven and allow to cool for a few minutes.
While the cookies are still warm, fill each thumbprint with a small amount of chocolate hazelnut spread. Allow to cool completely before serving.
Extra Tips
- For an extra touch, sprinkle some sea salt on top of the hazelnut spread before it sets for a delightful contrast.
Nutritional Breakdown (Per Serving)
- Calories: 150 kcal
- Total Fat: 10g
- Saturated Fat: 4g
- Cholesterol: 20mg
- Sodium: 50mg
- Total Carbohydrates: 17g
- Dietary Fiber: 1g
- Sugars: 8g
- Protein: 2g