Homemade Peanut Butter Cups with Crunchy Quinoa
Highlighted under: Sweet Favorites
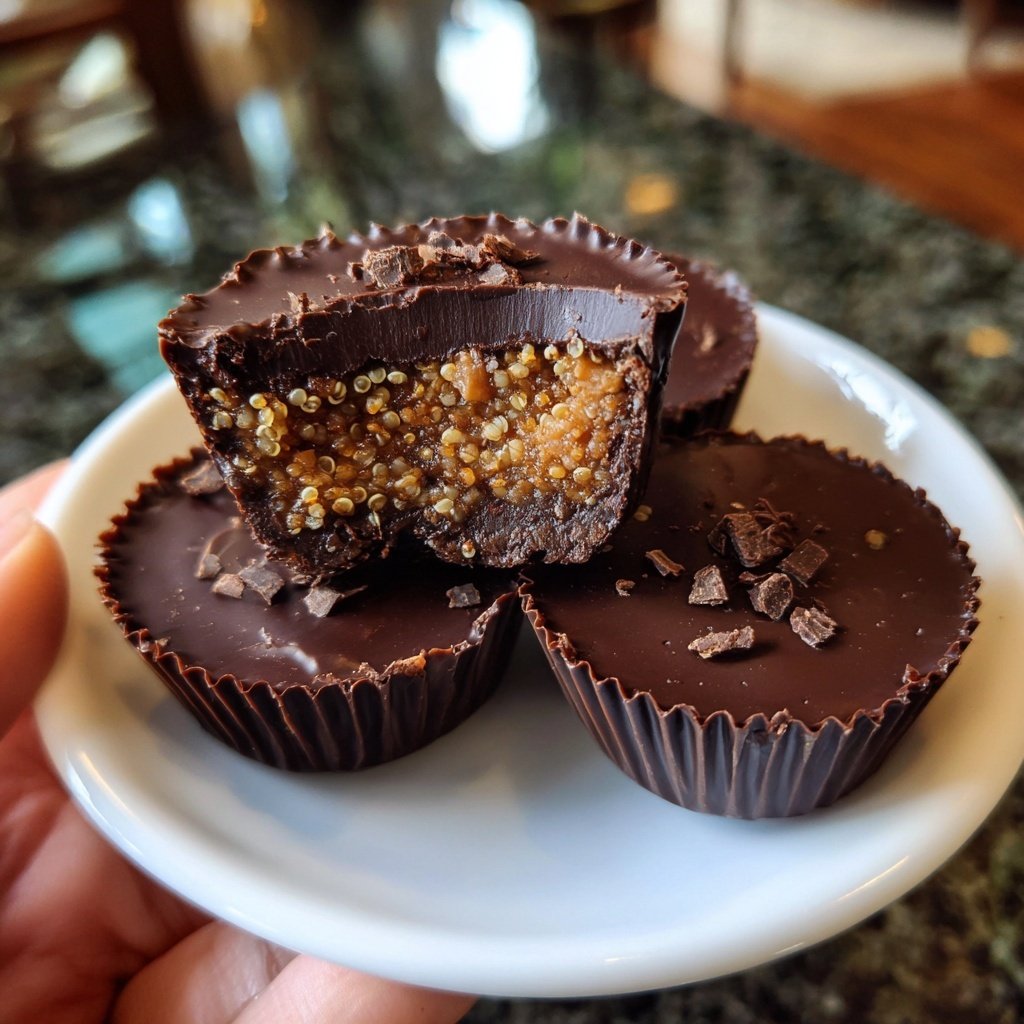
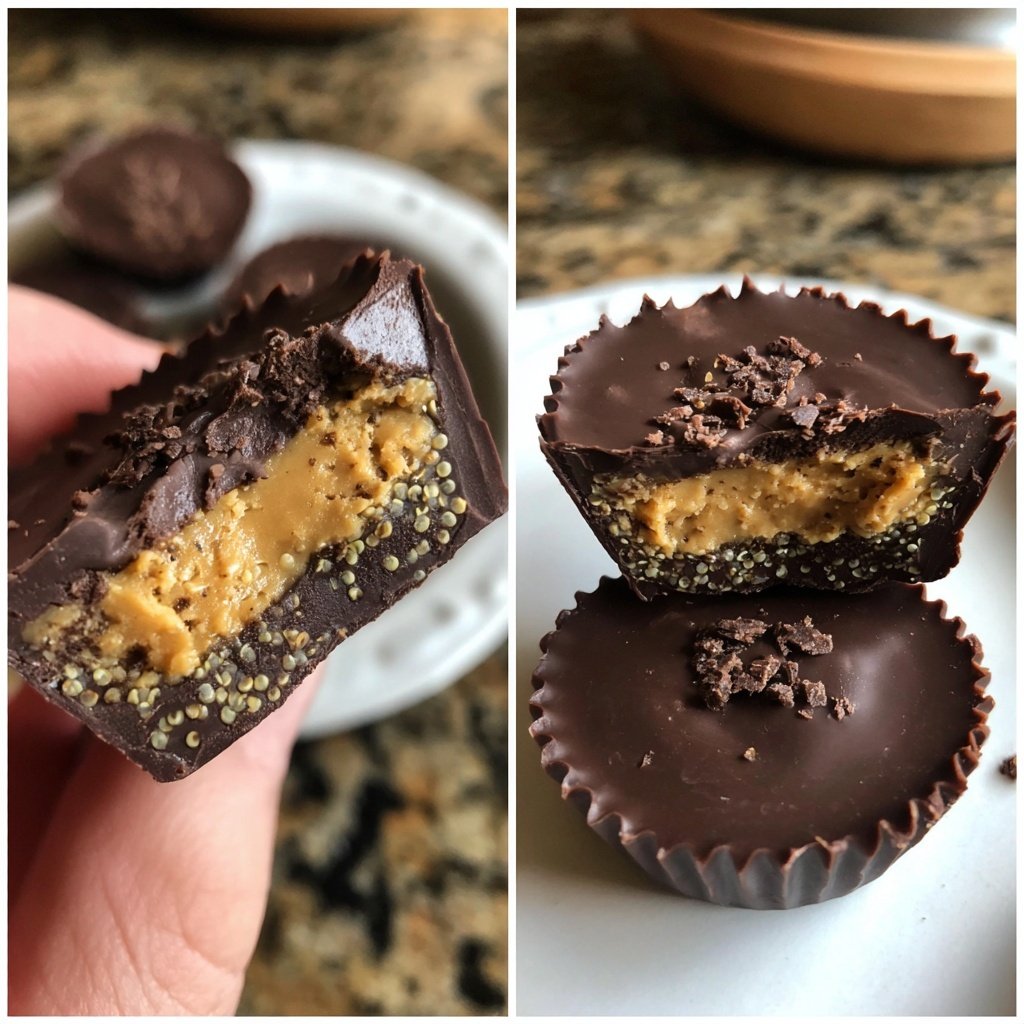
I love making these Homemade Peanut Butter Cups with Crunchy Quinoa because they are not only a delightful treat but also incredibly easy to prepare. Mixing creamy peanut butter with the crunchiness of quinoa creates a unique texture that elevates the classic peanut butter cup. Every bite gives you that wonderful combination of sweet and salty, making it hard to resist having just one. These cups are perfect for satisfying my sweet tooth or impressing guests at a gathering, and the best part is you can make them in under an hour!
When I first experimented with adding quinoa to my homemade peanut butter cups, I was pleasantly surprised by how it added a delightful crunch. I always felt that traditional recipes lacked that extra texture; the quinoa transforms them from simply sweet to something truly unique. Using fresh nut butter ensures that the flavor is rich and authentic.
Another tip I discovered is tempering the chocolate properly. By doing this, the coating becomes shinier and snaps perfectly when you bite into it. It's a small step that makes a significant difference in presentation and taste!
Why You'll Love This Recipe
- Rich peanut butter flavor with a crunchy twist from quinoa
- Easy to customize with your favorite chocolate or toppings
- Perfect for snacks, desserts, or as a gift
The Role of Quinoa in Texture
Incorporating quinoa into your homemade peanut butter cups not only adds a nutritious element but also introduces a delightful crunch that contrasts with the smooth peanut butter. It's essential to use cooked quinoa that has cooled to room temperature; this ensures it blends seamlessly into the filling without altering the consistency. Make sure to rinse the quinoa well before cooking to remove any bitterness, enhancing the overall flavor of the cups.
When adding cooked quinoa, you can experiment with different textures. For a more pronounced crunch, try using puffed quinoa instead. It will give your peanut butter cups a lighter feel while retaining that necessary crunch. Just make sure to adjust the quantity based on how crunchy you want your filling—start with half a cup and add more as needed.
Choosing Your Chocolate Wisely
The type of chocolate you choose significantly impacts the final flavor of your peanut butter cups. Dark chocolate is recommended for its rich, bittersweet taste that beautifully complements the salty sweetness of the peanut butter. Opt for high-quality chocolate chips with at least 70% cocoa content to achieve a velvety texture when melted. If you're not a dark chocolate fan, feel free to substitute with milk or white chocolate—just keep in mind that this will alter the flavor balance.
When melting the chocolate, using a double boiler can help maintain a steady, low temperature, ensuring you don’t scorch the chocolate. If using a microwave, take care to stir often to achieve a glossy finish without overheating. If your chocolate is too thick, a splash of coconut oil (as suggested in the recipe) can help achieve the desired consistency for coating. Alternatively, you can use unsweetened cocoa butter for a similar result.
Storage and Serving Suggestions
Once your peanut butter cups are fully set, they're easy to store. Keep them in an airtight container in the refrigerator for up to two weeks, making them a convenient grab-and-go snack. If you need longer storage, consider freezing them. Place the cups in a single layer on a baking sheet lined with parchment paper, freeze until solid, and then transfer them to a freezer-safe bag. They will keep well for up to three months; simply let them thaw at room temperature before enjoying.
For a fun twist, you can customize your peanut butter cups with toppings before sealing them with chocolate. Consider sprinkling a few sea salt flakes on top for a sweet-salty hit, or add chopped nuts or shredded coconut for added texture. You can also drizzle a contrasting chocolate over the tops for a decorative effect that impresses guests.
Ingredients
Gather the following ingredients before you start:
For the Peanut Butter Filling
- 1 cup creamy peanut butter
- 1/4 cup honey or maple syrup
- 1/2 teaspoon vanilla extract
- 1/2 cup cooked quinoa, cooled
For the Chocolate Coating
- 1 cup dark chocolate chips
- 1 tablespoon coconut oil (optional for sheen)
Make sure to have these ingredients on hand for a smooth cooking process.
Instructions
Here’s how to create your delicious peanut butter cups:
Prepare the Peanut Butter Filling
In a bowl, mix together the creamy peanut butter, honey (or maple syrup), vanilla extract, and cooked quinoa. Stir until well combined.
Melt the Chocolate
In a microwave-safe bowl, heat the dark chocolate chips with coconut oil in 30-second intervals, stirring in between, until fully melted.
Assemble the Cups
Line a muffin tin with cupcake liners. Pour a thin layer of melted chocolate into the bottom of each liner, then set in the freezer for 5 minutes to harden.
Add the Peanut Butter Filling
After the chocolate hardens, spoon a generous amount of the peanut butter mixture into each cup, spreading it evenly.
Top with Chocolate
Spoon more melted chocolate over the peanut butter layer, ensuring it's fully covered. Again, freeze for about 15 minutes to set.
Serve and Enjoy
Once set, remove from the muffin tin and enjoy your delicious homemade peanut butter cups!
Take your time to enjoy each step of the process!
Pro Tips
- For a fun twist, try mixing in different ingredients into the peanut butter filling, like pretzel bits or chocolate chips.
Troubleshooting Melting Chocolate
If your melted chocolate starts to seize up and become grainy, it's likely that moisture has been introduced. Ensure your bowl and utensils are completely dry before heating and consider adding a teaspoon of vegetable oil or solid coconut oil and stirring until smooth to salvage the chocolate. It's also helpful to keep a close eye on the microwave time, as chocolate can go from perfectly melted to burnt in seconds.
To prevent overheating, using a lower microwave power setting can be beneficial. Start with a 50% power level. Heat in 30-second intervals, stirring in between, until the chocolate is almost melted, then remove the bowl and stir until fully smooth. This will help you avoid burning the edges while ensuring a creamy texture.
Scaling the Recipe
If you want to make a larger batch of peanut butter cups, scaling the recipe is straightforward. Each ingredient can be doubled or tripled as needed, but keep in mind that larger amounts may take longer to set in the freezer. Allow sufficient time, possibly increasing the freezing time by an additional 5-10 minutes for each added batch to ensure they firm up well.
When scaling, also consider using a larger muffin tin or multiple tins to hold the excess cups. If using different tins, keep an eye on the melting chocolate and peanut butter filling ratios, as a larger may require you to adjust the number of layers you pour to maintain that perfect bite-sized treat.
Questions About Recipes
→ Can I use natural peanut butter?
Yes, natural peanut butter will work just fine. Just ensure it's creamy and well-stirred.
→ How do I store these peanut butter cups?
Store them in an airtight container in the refrigerator for up to two weeks or freeze for longer storage.
→ Can I make these vegan?
Absolutely! Just use maple syrup instead of honey and ensure your chocolate chips are dairy-free.
→ What can I substitute for quinoa?
If you don't have quinoa on hand, you can try using puffed rice or crushed nuts for a similar crunch.
Homemade Peanut Butter Cups with Crunchy Quinoa
Created by: Ffion Llewellyn
Recipe Type: Sweet Favorites
Skill Level: Easy
Final Quantity: 12 servings
What You'll Need
For the Peanut Butter Filling
- 1 cup creamy peanut butter
- 1/4 cup honey or maple syrup
- 1/2 teaspoon vanilla extract
- 1/2 cup cooked quinoa, cooled
For the Chocolate Coating
- 1 cup dark chocolate chips
- 1 tablespoon coconut oil (optional for sheen)
How-To Steps
In a bowl, mix together the creamy peanut butter, honey (or maple syrup), vanilla extract, and cooked quinoa. Stir until well combined.
In a microwave-safe bowl, heat the dark chocolate chips with coconut oil in 30-second intervals, stirring in between, until fully melted.
Line a muffin tin with cupcake liners. Pour a thin layer of melted chocolate into the bottom of each liner, then set in the freezer for 5 minutes to harden.
After the chocolate hardens, spoon a generous amount of the peanut butter mixture into each cup, spreading it evenly.
Spoon more melted chocolate over the peanut butter layer, ensuring it's fully covered. Again, freeze for about 15 minutes to set.
Once set, remove from the muffin tin and enjoy your delicious homemade peanut butter cups!
Extra Tips
- For a fun twist, try mixing in different ingredients into the peanut butter filling, like pretzel bits or chocolate chips.
Nutritional Breakdown (Per Serving)
- Calories: 180 kcal
- Total Fat: 10g
- Saturated Fat: 3g
- Cholesterol: 0mg
- Sodium: 80mg
- Total Carbohydrates: 18g
- Dietary Fiber: 2g
- Sugars: 8g
- Protein: 4g