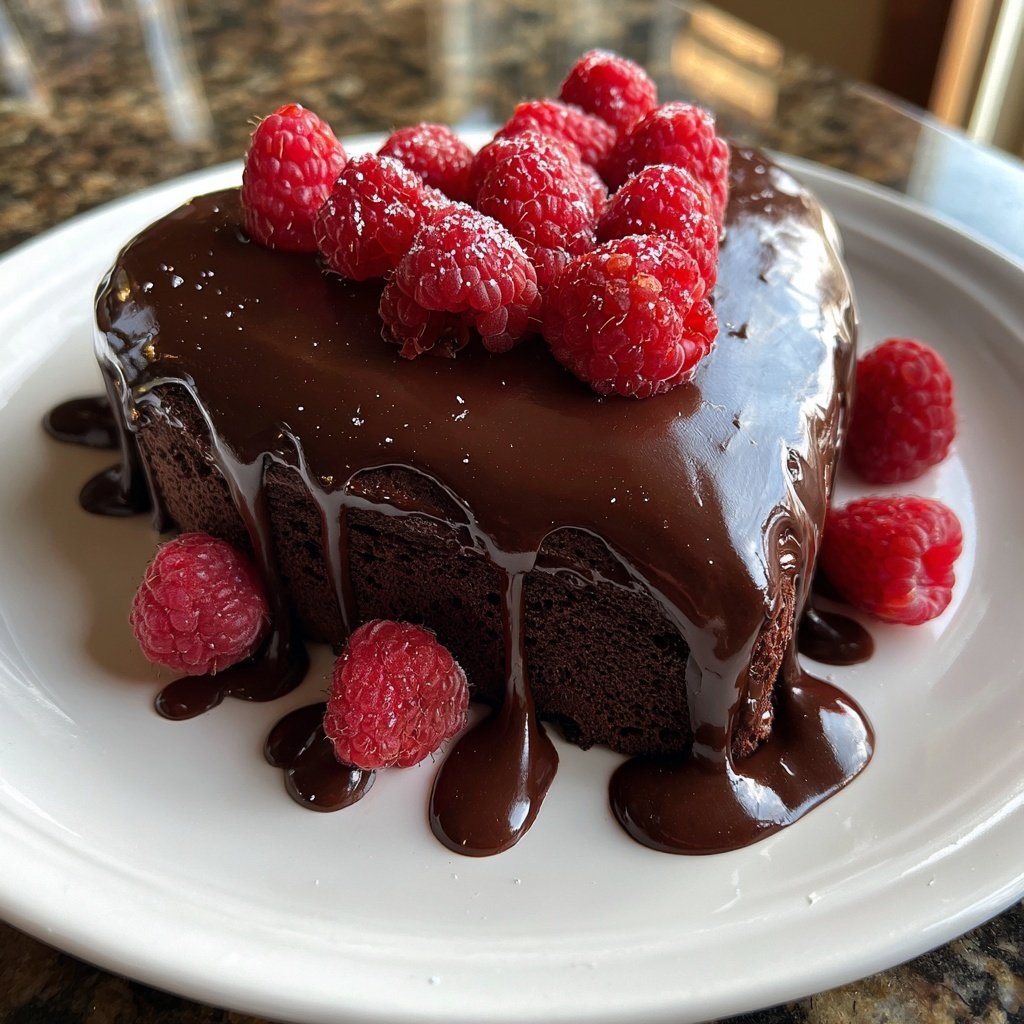
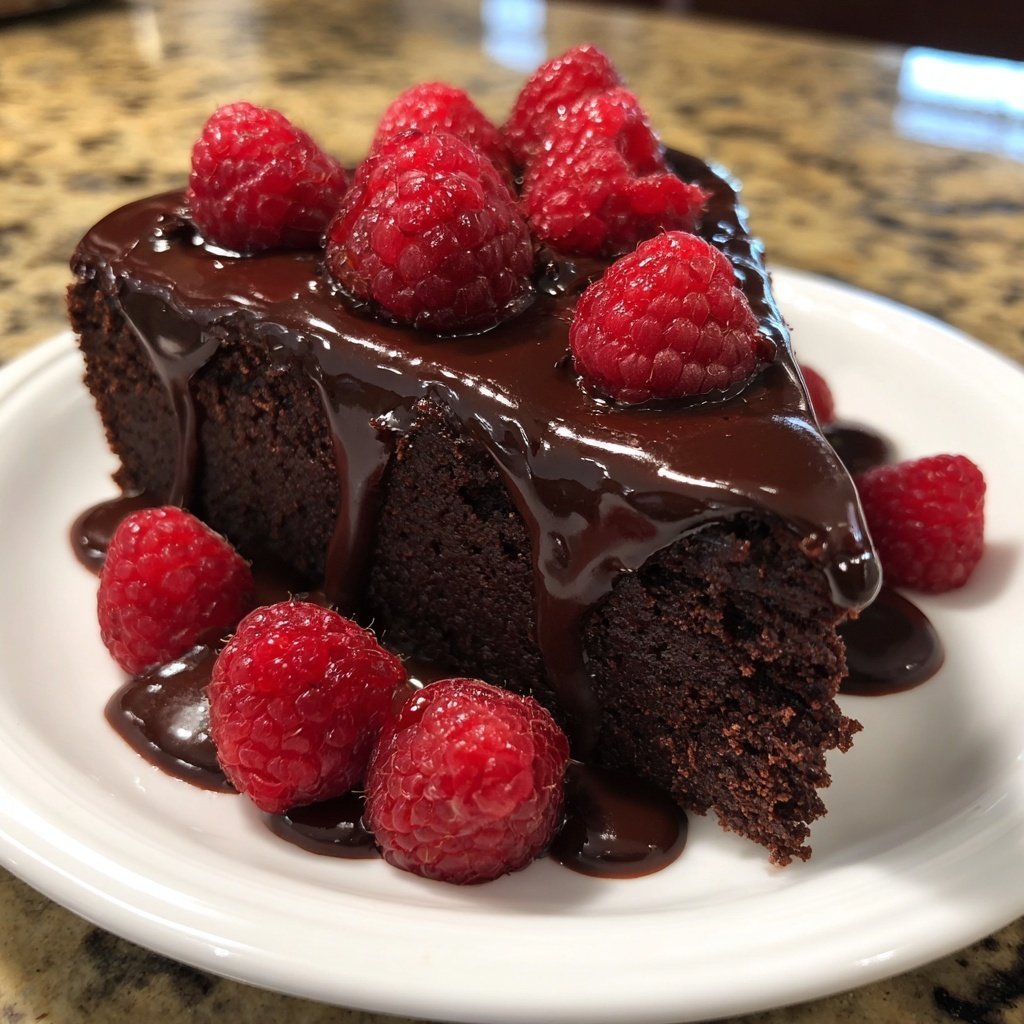
Heart-Shaped Chocolate Cake
Highlighted under: Sweet Favorites
When I first set out to create a heart-shaped chocolate cake, I wanted it to be a true showstopper for my loved ones. This delightful dessert is not just an exquisite treat; it’s a symbol of love and affection. The rich chocolate flavor combined with a moist, tender crumb makes every bite an indulgence. I’ve added my favorite twist with some orange zest, which elevates the classic chocolate taste and adds a refreshing hint. Trust me, this cake is perfect for any occasion, especially when you want to impress someone special.
Creating this heart-shaped chocolate cake was an exciting endeavor. I remember my kitchen bustling with flour and cocoa powder, the aroma captivating as it filled the air. To ensure the cake remained moist, I decided to incorporate buttermilk, yielding a richer texture that tantalizes the palate. I emphasize the importance of letting the cake cool completely before frosting, as this prevents the icing from melting away.
The first slice of this cake was a memorable moment. I paired the frosting with a sprinkle of sea salt to balance the sweetness, which has become my go-to trick. This cake has become a staple for birthdays and anniversaries, transforming simple gatherings into cherished celebrations.
Why You'll Love This Recipe
- Rich chocolate flavor paired with fresh orange zest
- Creamy texture that melts in your mouth
- Perfect for celebrations or as a sweet indulgence
The Importance of Ingredients
Each ingredient in this Heart-Shaped Chocolate Cake plays a crucial role in achieving the ultimate flavor and texture. For instance, using high-quality cocoa powder is key to a rich chocolate taste. I recommend opting for Dutch-processed cocoa for a smoother taste and darker color. Also, the buttermilk not only adds moisture to the cake but also reacts with the baking soda to create a tender crumb. If buttermilk is hard to find, you can make a substitute by adding a tablespoon of white vinegar or lemon juice to a cup of regular milk and letting it sit for 5-10 minutes.
The orange zest adds a refreshing contrast to the cake’s deep chocolate flavor. Make sure to use fresh orange zest instead of bottled extracts for the best taste. Zest the orange using a microplane or a fine grater, being careful to avoid the bitter white pith underneath. This zest brightens the flavor profile and balances the richness. You can adjust the amount based on your personal preference, but I recommend starting with the zest of one orange so it doesn’t overpower the chocolate.
Perfecting the Baking Process
When it comes to baking the cake, achieving the right texture depends heavily on monitoring your oven's temperature. Ensure that your oven is preheated thoroughly to 350°F (175°C) before placing the cakes inside. If you’re unsure about your oven's accuracy, it's wise to invest in an oven thermometer. This will help you maintain consistent baking conditions. Keep a close watch on your cakes, as even a minute too long can lead to a dry texture—aim for the cake to spring back when touched lightly in the center.
Cooling the cakes properly is equally important. Once you remove the cakes from the oven, let them cool in the pans for about 10 minutes. This allows them to firm up, making them easier to transfer. Use a butter knife to gently loosen the edges before inverting them onto a wire rack. If they're too warm when you frost them, the frosting can melt and slide off. Make sure to let them cool completely—about 1 hour—before applying the frosting, as a warm cake can result in a gooey mess.
Ingredients
Gather the following ingredients before you start baking:
For the Cake
- 1 ¾ cups all-purpose flour
- 2 cups granulated sugar
- ¾ cup unsweetened cocoa powder
- 1 ½ teaspoons baking powder
- 1 ½ teaspoons baking soda
- 1 teaspoon salt
- 2 large eggs
- 1 cup buttermilk
- ½ cup vegetable oil
- 2 teaspoons vanilla extract
- 1 cup boiling water
- Zest of 1 orange
For the Frosting
- 1 cup unsalted butter, softened
- 3 ½ cups powdered sugar
- ½ cup unsweetened cocoa powder
- ½ cup heavy cream
- 1 teaspoon vanilla extract
- Pinch of sea salt
Make sure to measure all ingredients carefully for the best results.
Instructions
Follow these steps to create your heart-shaped chocolate cake:
Prepare the Cake Batter
Preheat your oven to 350°F (175°C). Grease and flour two heart-shaped cake pans. In a large bowl, combine the flour, sugar, cocoa powder, baking powder, baking soda, and salt. Whisk together until well mixed. Then add the eggs, buttermilk, vegetable oil, and vanilla extract, and mix until smooth. Gradually stir in the boiling water and orange zest until completely blended.
Bake the Cake
Divide the batter evenly between the prepared pans and smooth the tops with a spatula. Bake for 30 minutes, or until a toothpick inserted in the center comes out clean. Allow the cakes to cool in the pans for 10 minutes before transferring them to a wire rack to cool completely.
Make the Frosting
In a large mixing bowl, beat the softened butter using an electric mixer until creamy. Gradually add the powdered sugar and cocoa powder, mixing on low speed. Pour in the heavy cream, vanilla extract, and a pinch of sea salt, and beat until the frosting is smooth and fluffy.
Assemble the Cake
Once the cakes have completely cooled, place one layer on a serving platter. Spread a generous amount of frosting on top, and then place the second layer on top. Frost the top and sides of the cake, creating decorative swirls if desired. You can also garnish with chocolate shavings or fresh orange slices.
Enjoy your heart-shaped chocolate cake with family and friends!
Pro Tips
- For an extra layer of flavor, try adding a tablespoon of espresso powder to the cake batter. It enhances the chocolate taste beautifully without making the cake taste like coffee.
Frosting Techniques
Creating the perfect frosting for your heart-shaped cake is all about achieving the right consistency. When beating the softened butter, aim for a light and fluffy texture that looks pale in color. Gradually adding the powdered sugar prevents clumping, while mixing on low speed minimizes mess. If your frosting feels too thick, you can add a splash of heavy cream to loosen it up. Conversely, if it’s too thin, incorporate more powdered sugar until you reach that perfect spreadable but still firm consistency.
For a smooth finish on your cake, consider using an offset spatula or a bench scraper to spread the frosting evenly. Start by applying a thin layer of frosting to seal in any crumbs—a step known as crumb-coating. Once that’s set for about 15-30 minutes in the refrigerator, follow up with a thicker layer for the final coat. Using a piping bag can provide a decorative touch, allowing you to create beautiful swirls or rosettes for an elegant presentation.
Storage and Serving Suggestions
This Heart-Shaped Chocolate Cake can be made in advance, making it a fantastic choice for celebrations. To store, wrap the cooled cake layers tightly in plastic wrap and freeze for up to 2 months. Thaw them in the refrigerator overnight before frosting and serving. If you have leftover cake, it can be stored at room temperature for up to 2 days or refrigerated for a week. Just ensure it’s well-covered to prevent it from drying out.
For serving, consider pairing this luscious cake with fresh seasonal fruits or a scoop of vanilla ice cream. The freshness of berries or slices of orange complements the rich chocolate perfectly. If you want to add some flair, dust the top of the cake with cocoa powder or powdered sugar just before serving. This not only adds a charming touch but also enhances the visual appeal of your heart-shaped masterpiece.
Questions About Recipes
→ Can I use a different shape pan?
Yes, you can use round or square pans. Adjust baking time as necessary.
→ How do I store leftover cake?
Store in an airtight container at room temperature for up to 3 days or refrigerate for up to a week.
→ Can I freeze the cake?
Absolutely! Wrap the cooled cake layers tightly in plastic wrap and freeze for up to 3 months.
→ What can I substitute for buttermilk?
You can use regular milk mixed with a tablespoon of vinegar or lemon juice instead.
Heart-Shaped Chocolate Cake
Created by: Ffion Llewellyn
Recipe Type: Sweet Favorites
Skill Level: Intermediate
Final Quantity: 8 servings
What You'll Need
For the Cake
- 1 ¾ cups all-purpose flour
- 2 cups granulated sugar
- ¾ cup unsweetened cocoa powder
- 1 ½ teaspoons baking powder
- 1 ½ teaspoons baking soda
- 1 teaspoon salt
- 2 large eggs
- 1 cup buttermilk
- ½ cup vegetable oil
- 2 teaspoons vanilla extract
- 1 cup boiling water
- Zest of 1 orange
For the Frosting
- 1 cup unsalted butter, softened
- 3 ½ cups powdered sugar
- ½ cup unsweetened cocoa powder
- ½ cup heavy cream
- 1 teaspoon vanilla extract
- Pinch of sea salt
How-To Steps
Preheat your oven to 350°F (175°C). Grease and flour two heart-shaped cake pans. In a large bowl, combine the flour, sugar, cocoa powder, baking powder, baking soda, and salt. Whisk together until well mixed. Then add the eggs, buttermilk, vegetable oil, and vanilla extract, and mix until smooth. Gradually stir in the boiling water and orange zest until completely blended.
Divide the batter evenly between the prepared pans and smooth the tops with a spatula. Bake for 30 minutes, or until a toothpick inserted in the center comes out clean. Allow the cakes to cool in the pans for 10 minutes before transferring them to a wire rack to cool completely.
In a large mixing bowl, beat the softened butter using an electric mixer until creamy. Gradually add the powdered sugar and cocoa powder, mixing on low speed. Pour in the heavy cream, vanilla extract, and a pinch of sea salt, and beat until the frosting is smooth and fluffy.
Once the cakes have completely cooled, place one layer on a serving platter. Spread a generous amount of frosting on top, and then place the second layer on top. Frost the top and sides of the cake, creating decorative swirls if desired. You can also garnish with chocolate shavings or fresh orange slices.
Extra Tips
- For an extra layer of flavor, try adding a tablespoon of espresso powder to the cake batter. It enhances the chocolate taste beautifully without making the cake taste like coffee.
Nutritional Breakdown (Per Serving)
- Calories: 380 kcal
- Total Fat: 26g
- Saturated Fat: 15g
- Cholesterol: 195mg
- Sodium: 85mg
- Total Carbohydrates: 32g
- Dietary Fiber: 3g
- Sugars: 24g
- Protein: 6g